Kubernetes (K8s) - container orchestrator?
Container management done right with Kubernetes!


Overview
In the last blog, we learned about docker and how we can exploit it to run applications in containers. It eventually helps us to visualize how our apps can run efficiently on the servers and operating systems without putting much load, occupying a minimum amount of space in an isolated environment. We also looked in depth at its encapsulation, security, and portability features which ease the strain on developers to set up the application project on their systems without any hassle.
All of this is fine. But here's the question.
What if there are hundreds of containers to set up a huge project instead of just two or three containers?
Management becomes a huge concern to automate running processes, deployment, and scaling. We need a technology that does all of it by itself. If there is a service that has gone down, it should be able to restart those containers within no time. without having us to look into it repeatedly.
Don't you worry because Kubernetes comes to the rescue!
Stay tuned🤞as we will look into the nitty-gritty of it shortly.
Brief history
Let's see how the components of an application were structured in the early days.
Monolithic application
It's a way in which each and every part or component is bundled in one container. As the name "Monolithic" suggests, "mono" means "one".
For the sake of simplicity, let's take an example of an app that contains a UI/UX frontend, a backend, a database, chat messaging storage, and a networking app. If all these components are bundled together in a single container as one application, it is called a monolithic architectural application.
So if you want to deploy this container, you can do it as a whole. Let's say a client wants some changes to be made in the backend component. So, basically, you would have to stop running the whole container for a while, make the required changes and then deploy the container again.
Let's say in the near future that notorious client comes again a million times asking us to make a teeny-weeny change (perhaps to delete a character) in some front-end stuff. So it becomes a huge pain to shut down the container, make that change and restart the container for the millionth time.
Considering the complications we can run into while building this type of application, we can safely say that monolithic architecture is a very bad design.
How do we solve this problem? Microservices!
Microservices
In this case, instead of considering all the components of the application which were stored in a single container, each of those components will act as a separate application. Meaning each application component is in an isolated container.
So, instead of one container, we will have 5 containers each for frontend, backend, database, chat messages, and networking stuff. These are called microservices. For a huge service we have for an application, we will have 5 microservices that take care of the maintenance of the individual components of the app.
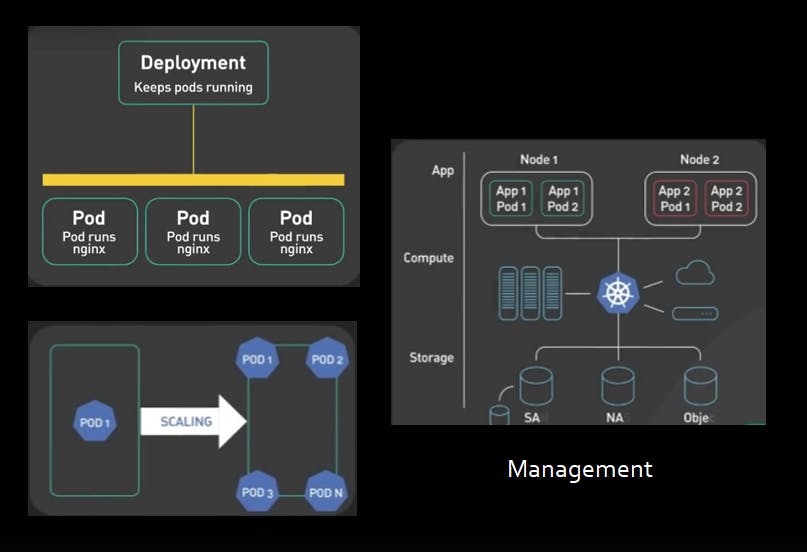
Suppose we want to make changes to a particular container (say database container) or scale it to 5 or 6 replicas. In that case, that can be done easily without having to shut down the remaining containers. Since each component is in a separate container, it will become easy to make changes. The other containers can keep running until they are told not to.
But what if instead of these 5 containers, we have 1000? It will eventually become a headache even if these containers' load is distributed into multiple servers. Editing, deleting, and updating these container apps with different versions and zero downtime will be even harder now since we are dealing with a huge number of them.
This is where the Kubernetes orchestrator comes in!
What is Kubernetes?
Kubernetes is an open-source orchestrator platform automating the deployment, scaling, and management of containerized applications dynamically. It helps in streamlining zero downtime of containers, healing them when they go down, and running updates seamlessly along with scalability features. These are also the inherent properties of cloud-native applications.
In simple terms, we can say that Kubernetes acts as a manager that coordinates the work done by microservices.
Here we have an analogy to a conductor who, with his various hand movements, conducts the orchestra. With the help of his slightest hand gestures, the musicians playing cello, flute, clarinet, harp, piano, violin, drums, etc., are able to align the sound coming out of their instruments thus producing a beautiful harmony.

Similarly, Kubernetes does the same job as the orchestra conductor! The only difference is that instead of instruments we have microservices, containers running applications. And Kubernetes, the orchestrator, looks after them.
Fun fact: Kubernetes is also called K8s. You ask why? It's because there are 8 characters between 'K' and 's', hence it is much easier to say k8s rather than Kubernetes.
Why Kubernetes?
Kubernetes does much more than just orchestration...
It can be run on any cloud platform.
It can be migrated from one cloud provider to another.
It can replicate and scale services and deployments.
It can run on dedicated servers.
It executes automatic rollbacks and horizontal scaling.
It handles zero downtime.
It has a good fault tolerance.
It initiates the self-healing of containers and clusters making sure they keep running.
It provides load balancing.
It can be used on external storage and volumes.
History of Kubernetes
Kubernetes was designed based on Google's "Borg" cluster manager by Joe Beda, Brendan Burns, Craig McLuckie, Brian Grant, and Tim Hockin. Google was internally running thousands of applications on a large-scale basis and was managing them using Borg. And on 2014, Google declared Kubernetes as an open-source project to which many people can contribute to it.
Google worked with the Linux Foundation to form Cloud Native Computing Foundation and donated Kubernetes to it.
"Kubernetes" is a Greek word that means a helmsman or a pilot. That's why the logo of Kubernetes looks like the controlling rudder of a ship.
Kubernetes used to interface with the containers using the docker container run time "dockershim" or "shim". But with due time, it wanted to directly talk to the containers and replaced shim with Containerd (spelled as "container-dee") in compliance with the Open Container Initiative (OCI).
Architecture
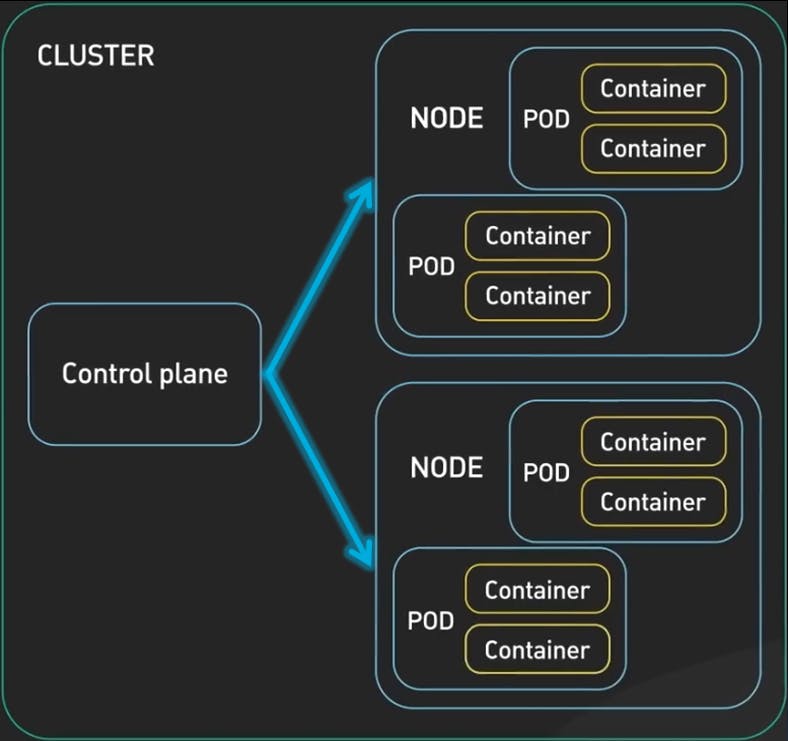
The architecture of Kubernetes can be understood by diving deep into the components that make up a Kubernetes cluster.
A cluster consists of a control plane and multiple worker nodes used to run containerized applications.
Control plane -
It manages the desired state of the cluster by maintaining the worker nodes.
It is a collection of various components that manages the overall health of the cluster. It does the work of creating new pods, scaling, and even shutting them down. But what are these components inside the control plane?
These components are control manager, scheduler, etcd and API server.
The "control manager" manages the current and the desired state of the cluster. It is responsible for running controllers. A controller is a non-terminating loop that watches the state of the cluster. Each controller tries to move the current state to a desired state. If there are any changes to make, it quickly follows up the process and makes sure the changes are reflected on the worker nodes.
The "scheduler" is responsible for scheduling and creating pods in the worker nodes. It uses information like the resources and space allocation used up by the nodes in order to place pods in them.
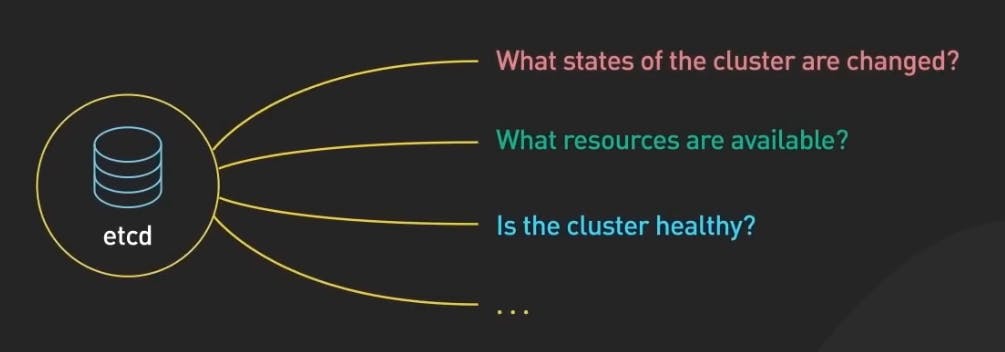
"etcd" is a database. It is a distributed key-value store. It stores the cluster's persistent state and configuration data. It is used by other components of the control plane to store and retrieve information about the cluster.
The "API server" is the primary interface between the "kubectl CLI and the control plane" and the "control plane and the worker nodes". It exposes Rest API that allows clients to interact with the control plane. The control plane uses the API server to talk to the kubelet of worker nodes. It receives HTTPS requests on port 443 like "create pods" by receiving YAML or JSON files.
'kubectl' is a Kubernetes CLI tool that helps us to communicate with the API server of the control plane to work with the nodes using REST APIs. For example, "setting up pods, deployments, services..etc."
There are two ways to give commands - declarative and imperative.
The declarative way includes commands to write at once in a file. For example,..YAML file. And the imperative way includes the single line commands that can be punched into the CLI terminal. "kubectl" helps us to do that. There are some basic kubectl commands that we'll look into shortly.
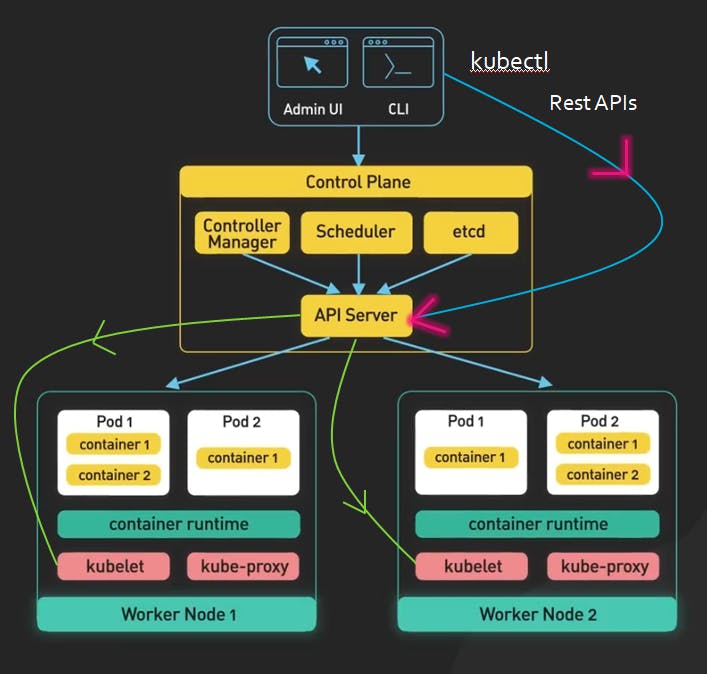
Worker nodes -
These nodes run applications within them. Inside the worker nodes, we have pods. And inside the pods, we have containers. And inside the container, we have applications. These nodes themselves can also be known as virtual machines.
Apart from pods, the worker nodes also contain container runtime, kubelet, and kube-proxy.
The "kubelet" is the daemon of a worker node. It receives instructions from the API server of the control plane to allocate using APIs. It ensures that the desired state of the pod is maintained and that all containers on the node are healthy. If one pod goes down, it re-deploys it.
The "container runtime" runs the container on the worker nodes. It executes tasks like pulling and pushing images into the registry, starting and stopping the containers, and thereby managing containers' resources.
Earlier, kubernetes used to run on "dockershim" but it has switched to "containerd".
The "kube proxy" is a network proxy in a worker node. It assigns IP addresses to nodes and pods so that it is able to route traffic to the respective pods of a node based on IP addresses and port numbers of the incoming request. It ensures load balancing and ensures traffic is evenly distributed across the pods.
Pod - A pod is a deployable scheduling unit in kubernetes. It is the basic building block of kubernetes applications.
Container - It is the innermost and lowest level component of a worker node. It runs applications within itself containing the libraries, binaries, and dependencies
So, what could be the steps to start a Kubernetes cluster?
Create microservices. Basically, create your application and divide it into various microservices.
Containerize them.
Put every container in a separate pod.
Deploy these pods to controllers.
Let's say you demand 5 pods to run. A controller will make sure it setups 5 pods. One example of a controller is a deployment controller.
Installation
First things first, we need the command line tool "kubectl". Visit this website -> kubectl-install and download the CLI for your respective operating systems.
Make sure you have docker desktop installed. We need this to visualize clusters. Here's the link to it.
Install minikube from here to run one node cluster for learning purpose. Take some time to view a few prerequisites and then go ahead downloading minikube.
You can play with kubernetes with a hands-on experience without having to install anything on the go with play-with-k8s !
Also, kubernetes clusters can be created with multi-node features provided by many cloud service providers like GCP, AWS, Azure, Civo,..etc. So without having to run anything on your local system, one can easily set up an infrastructure for the cluster according to the requirements.
But for now, let's just start walking before we run! 😉
Hands-on commands
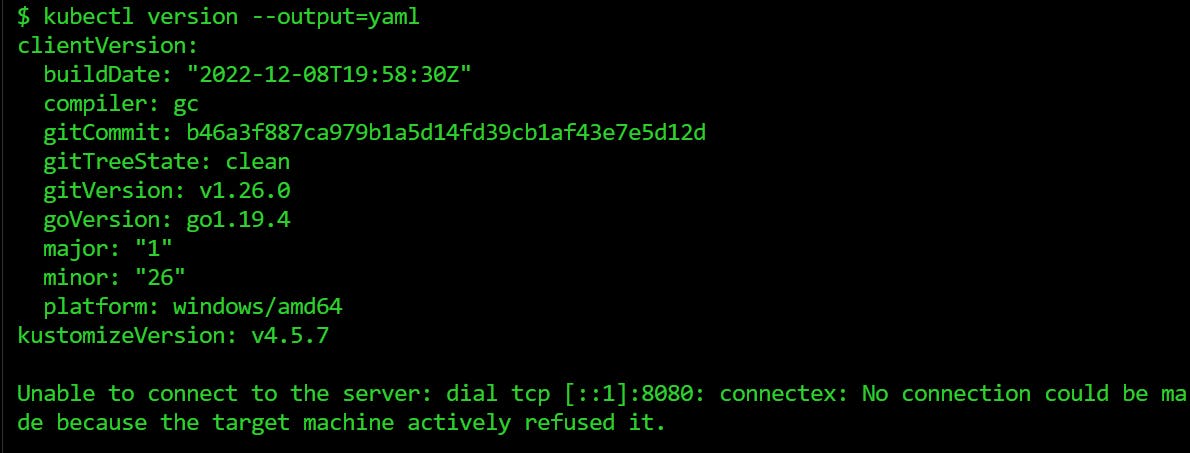
Once done with the installation process, check the versions to make sure everything works perfectly.
kubectl version
kubectl version --output=yaml # for a better look
minikube version

docker version

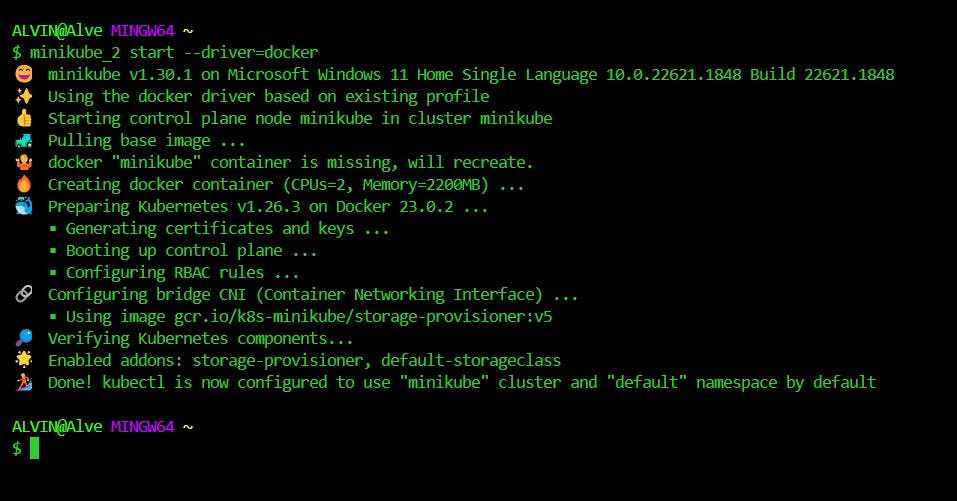
Let's start our minikube cluster!
minikube start --driver=docker
Since we have docker installed, we will run minikube using the driver "docker".
What is minikube you ask? Well it is a kubernetes one node cluster that runs on a virtualized container.
Let's just check the status of minkube cluster.
minikube status
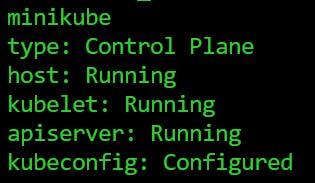
Once you see something like this, you are good to go!
Here kubeconfig is a file which has all the required configurations like cluster's address, authentication credentials and context settings used to run the kubernetes cluster.
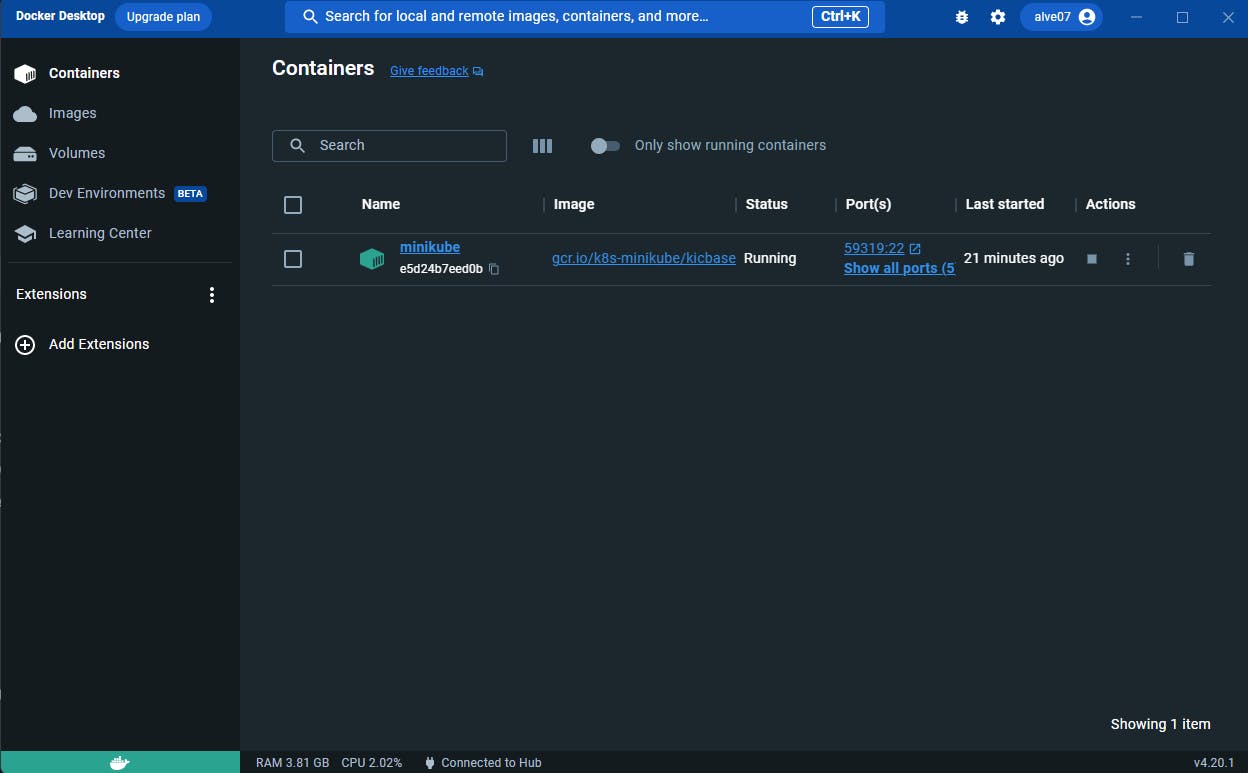
When you open your docker desktop, you'll see that a container named "minikube" has been created. Great job if you could come this far! Now without any further delay let's get started.
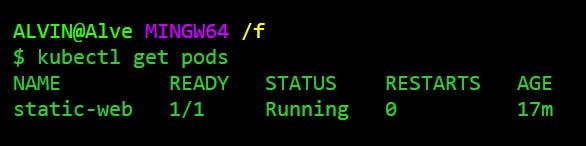
Let's see if we have any pods.
kubectl get pods

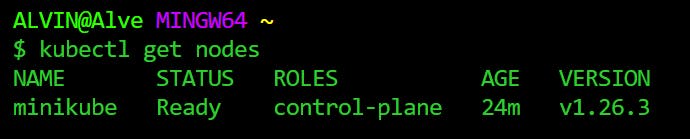
And, what about nodes? Here we go.
kubectl get nodes
Now what does this 👇command do?
minikube docker-env
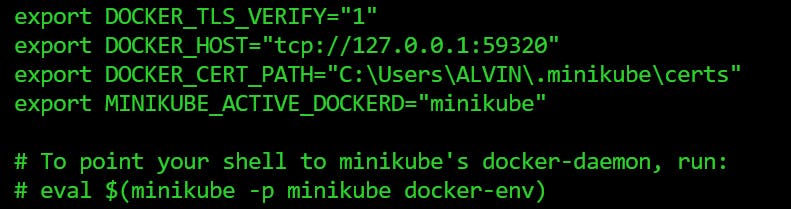
These are the environment variables that give instructions to the local docker client to communicate with the docker daemon inside the minikube container (virtual machine).
This ensures that the docker commands that you run on the host machine is understood by the docker daemon and you can exploit this feature to build, push and pull docker images that can be used within the minikube kubernetes cluster.
The running containers can be checked with this command...
docker container ls

While we have our minikube runnning, there are docker containers that run internally inside minikube.
minikube ssh
docker ps

Let's have a look at the kubeconfig file.
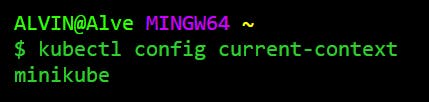
kubectl config view
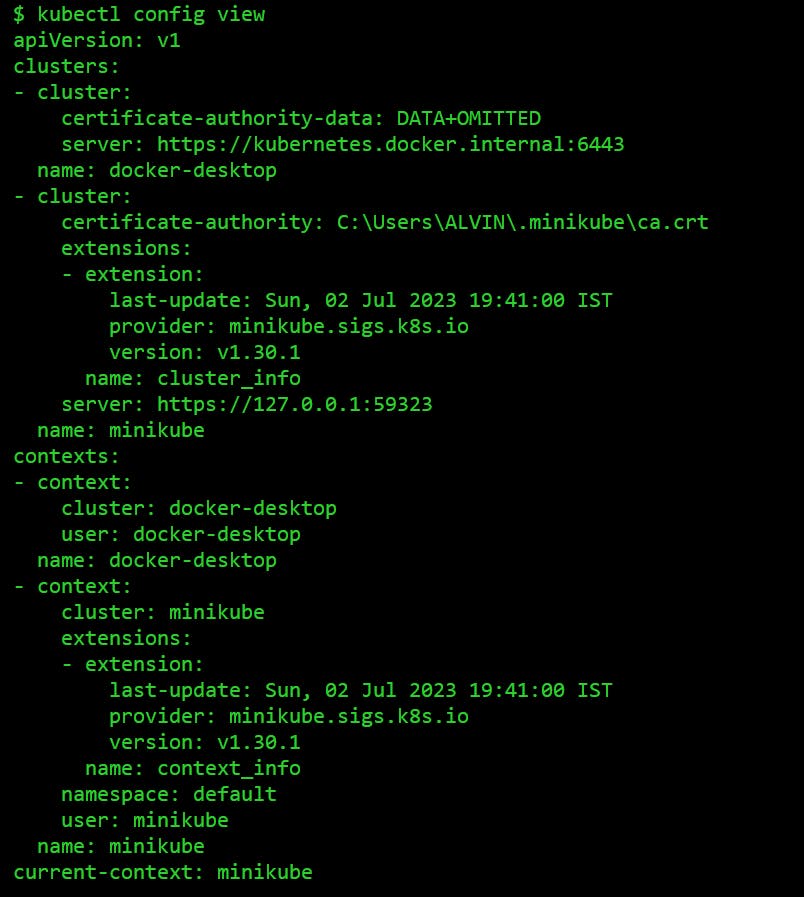
kubectl config current-context
The objects of a kubernetes cluster like pods, deployments, services etc., can be seen as a whole using this command...
kubectl get all

Since we don't have them already, we get none. No worries, let's create them.
apiVersion: v1
kind: Pod
metadata:
  name: static-web
  labels:
    role: myrole
spec:
  containers:
    - name: web
      image: nginx
      ports:
        - name: web
          containerPort: 80
          protocol: TCP
The code above is a YAML file that describes the necessary details in order to create a pod. Let's look into it one by one.
apiVersion: As the name suggests, it represents the version of the Kubernetes API being used. In this case, we have 'v1'.
kind: This field defines the kind of resource we are creating over here. And that would be a 'pod'.
metadata: It contains some extra information about the 'pod'. Here we have "static-web" as the name of the pod. And "label" gives us a key-value pair for labeling the pod, "role" : "my role".
spec: It defines the desired state of the pod. Inside "spec", we have a little detailed information about the pod. "containers" defines a list of containers that can reside inside a pod. Here, we have an "nginx" container named as "web". This particular container has a port name "web" that listens on port 80 and can be connected using the TCP protocol.
Now that we know the specifics of a pod's YAML file, let's create it right away!
touch pod.yaml
cat > pod.yaml
# paste the pod yaml code over here
# then hit enter followed by CTRL+C
cat pod.yaml # view the code
kubectl create -f pod.yaml
kubectl get pods
Now, if we check the pods, turns out there is in fact a pod named "static-web" that runs the nginx container in it!
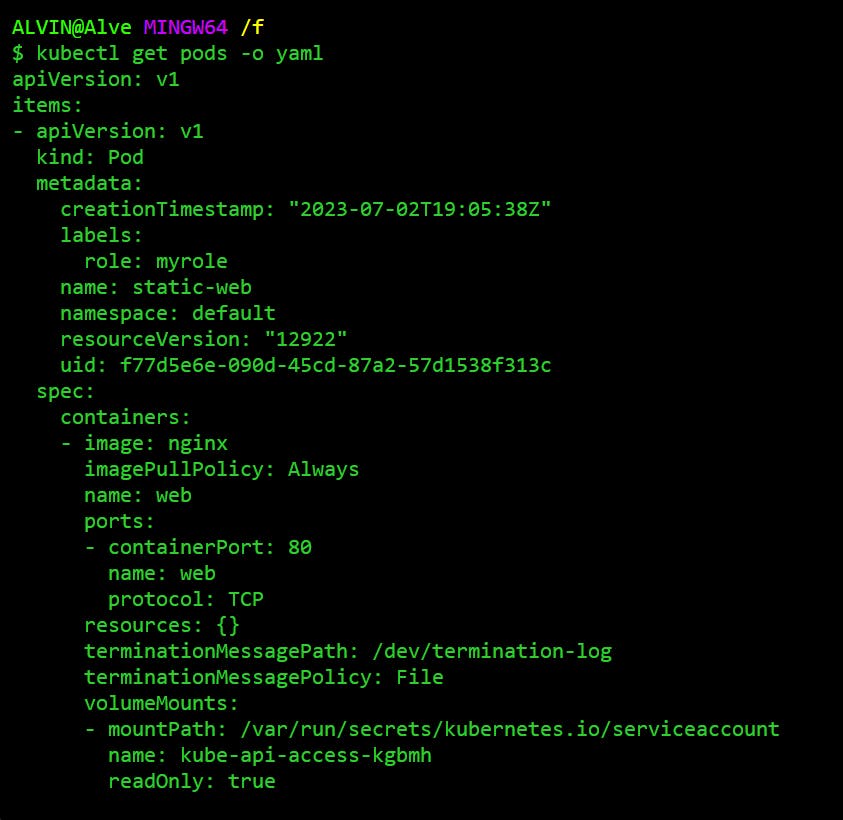
To get some info. on the pod attach the "-o wide" or "-o yaml".
kubectl get pods -o wide

kubectl get pods -o yaml
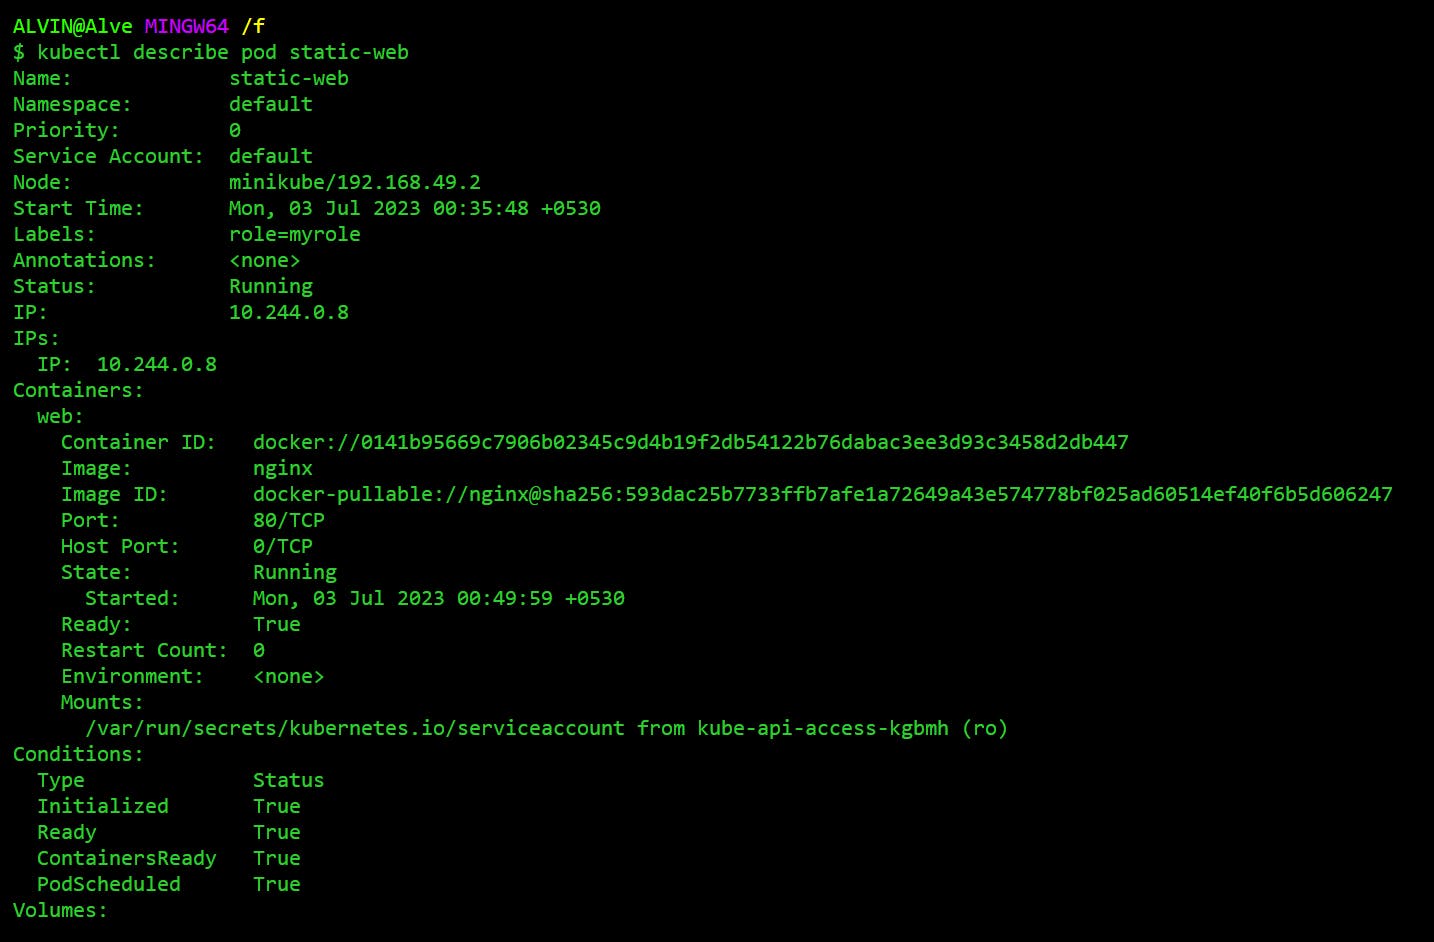
For more information, we can use the "describe pod" command.
kubectl describe pod static-web
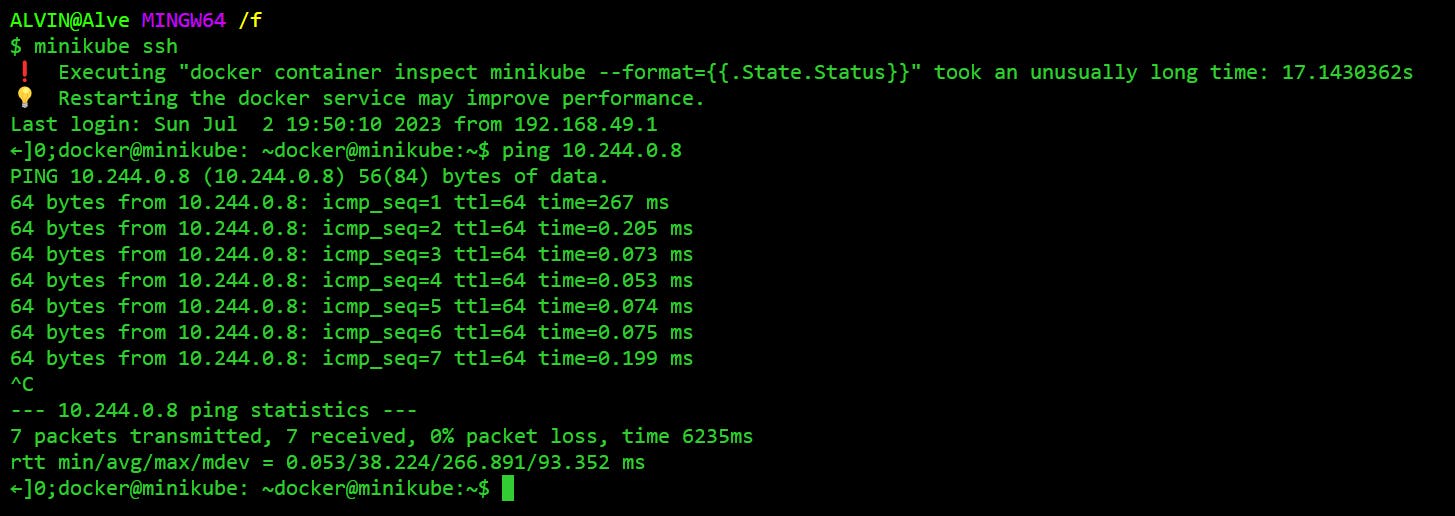
If we copy the IP address of the nginx pod and ping it after entering into the minikube cluster, we'll see that the control plane is able to make a connection with the pod. It means can receive and send requests to the outside world.
minikube ssh
ping 10.244.0.8
The pod can be deleted using the "delete" command.
kubectl delete pod static-web
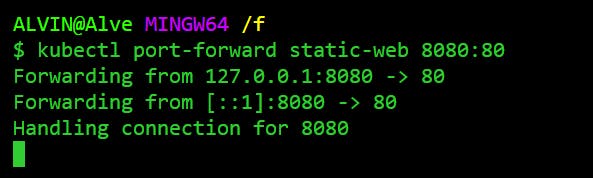
Since we are running an nginx container, we can access it by port forwarding. "nginx" listens on port 80 and we can instruct it to direct the traffic to port 8080 for us to visualize it.
kubectl port-forward static-web 8080:80
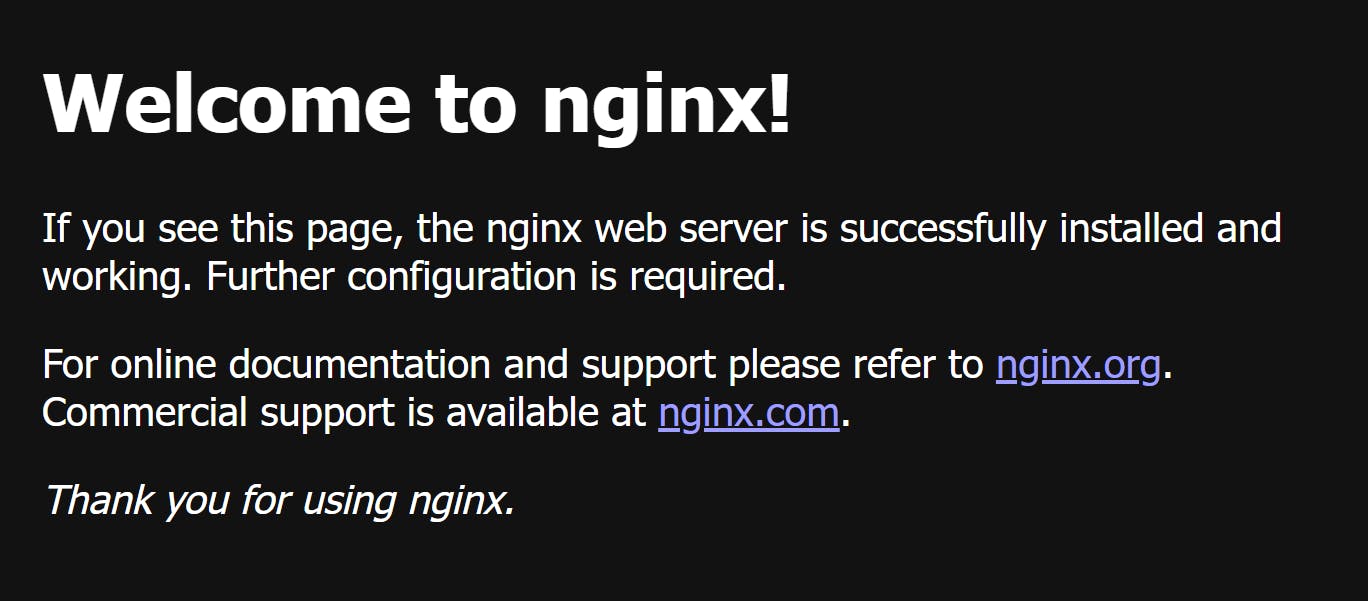
By hitting localhost:8080 on our browser we'll see this..
Cool IDEs to work around with
Lens IDE
It is an integrated development environment (IDE) created expressly for interacting with Kubernetes clusters. It offers an intuitive user interface and a number of capabilities that simplify managing and interacting with Kubernetes resources. The following are some of Kubernetes Lens's key characteristics:
Cluster visualization enables us to explore the cluster's resources, namespaces, nodes, and workloads in an interactive way.
YAML editor helps spin up a YAML file for any object in no time.
Real-time monitoring of clusters using metrics such as Prometheus.
Gives terminal access.
Git integration and much more.
Lens IDE can be installed from here. And it will look something like this...
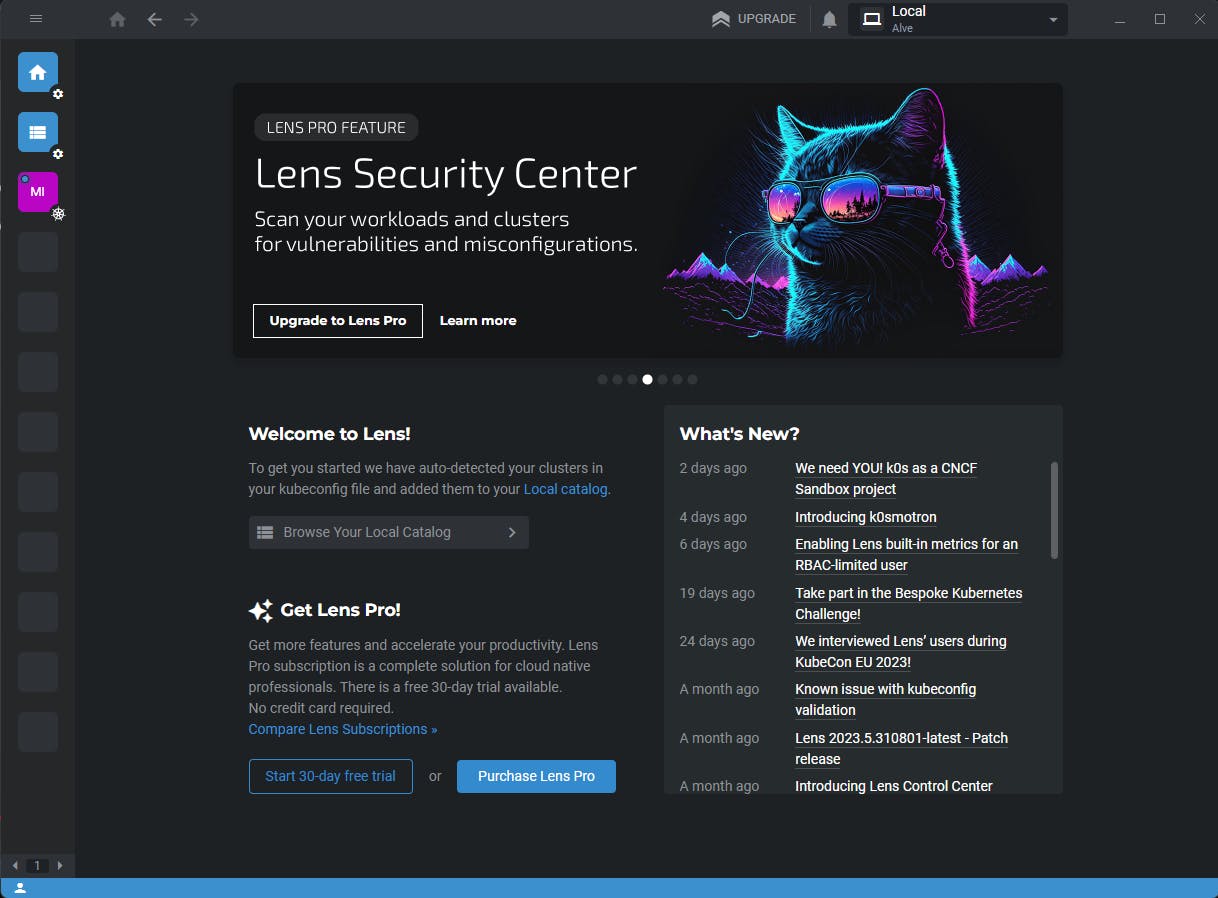
Lens instantly recognizes if there is a minikube cluster running in the local system. There is a file explorer on the left panel of the IDE where you'll see a minikube box appearing. Connect with it and then it will display the objects running in your cluster.
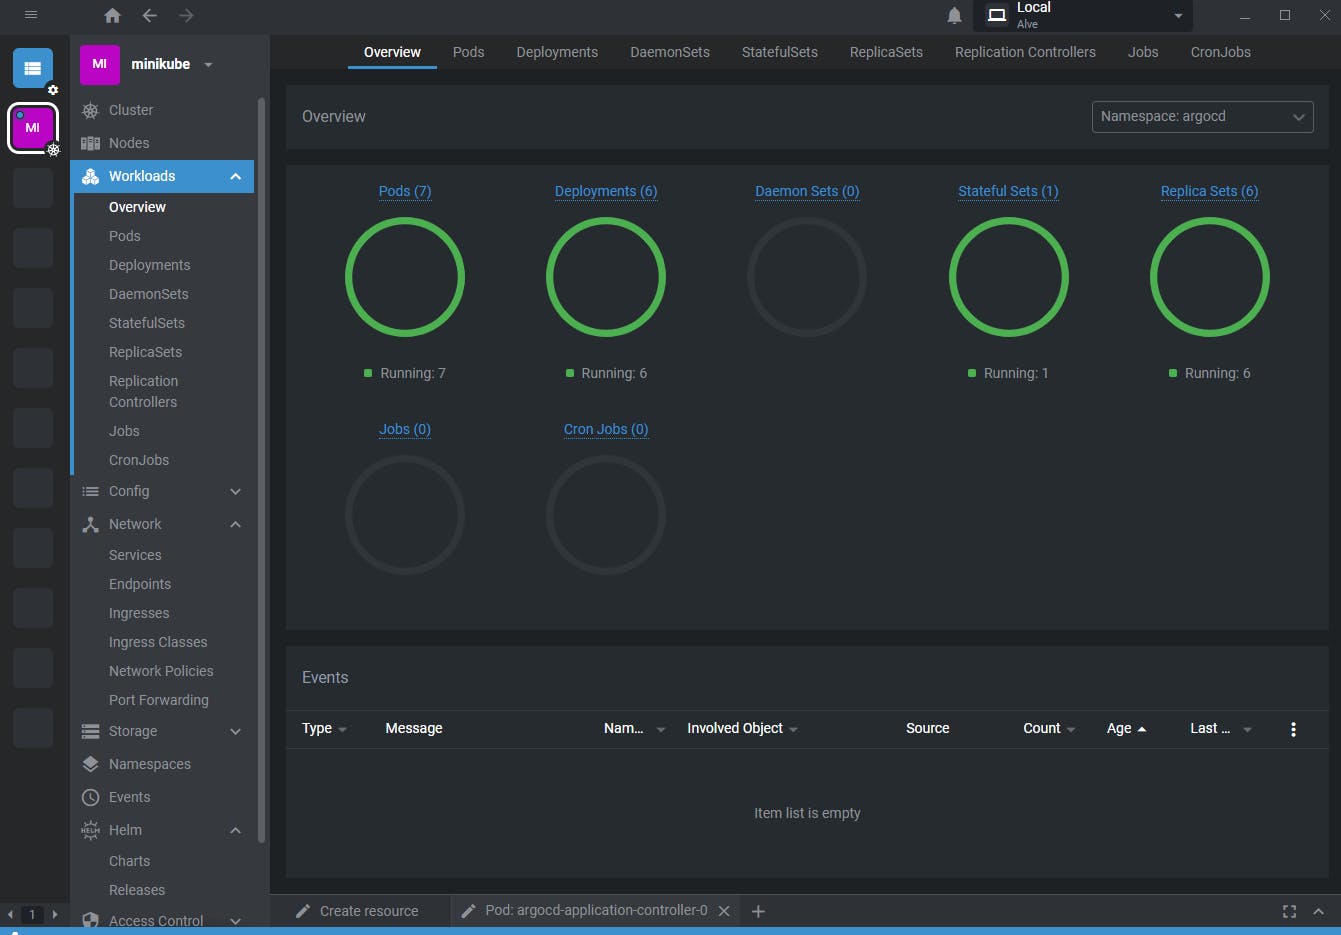
In the above image, as you can see, there are some pods, deployments, services, and replica sets running.
Lens will create any object for you be it a pod or a deployment.
On the bottom taskbar of the IDE, we have a "create resource" option. After clicking on it, we'll have to select a template (resource object) and it will drop down a list of them. You just have to choose the right one and it creates a YAML file for it. On the left side, we click on the "create" button. And there you go, your resource is ready!
Monokle IDE
Sometimes, a YAML file can get so huge that it becomes impossible to handle and visualize them. This is where Monokle helps us to overcome these problems. You can get it from here.
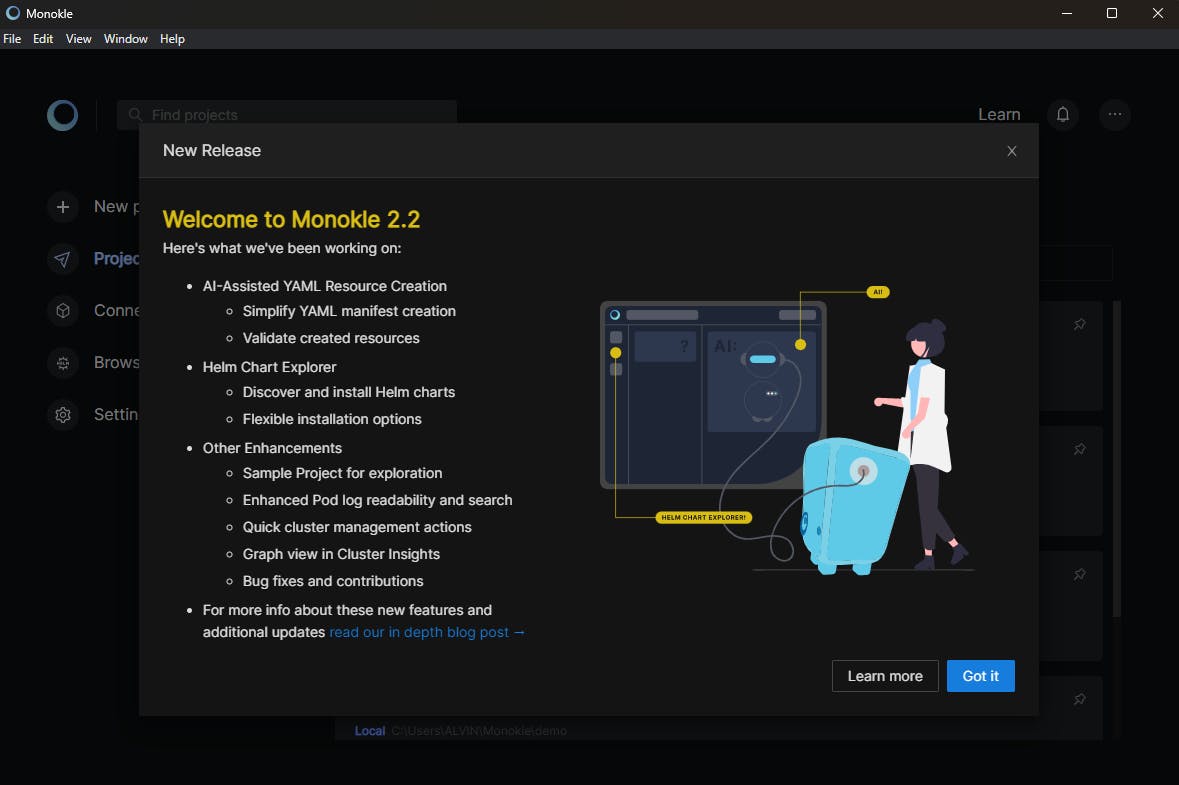
This is what it looks like once you open Monokle. Obviously, there will be a newer release by the time you are reading this.

Without getting into much detail just to give an overview, this is a project called "manifests" containing a list of YAML files. We can clearly see it handling a huge YAML file on the rightmost section. Pretty amazing right?
Wrapup
We came a long way in learning Kubernetes. How it came into existence? What benefit does it provide to the cloud native world and certainly got our head around with "kubectl" commands to get started with a Kubernetes cluster.
The way we deploy, manage, and scale applications has been revolutionized by the rise of Kubernetes as the de facto industry standard for container orchestration. Because of its potent characteristics and strong ecosystem, it is a crucial component of the contemporary cloud-native infrastructure.
References
Kubernetes Tutorial for Beginners | What is Kubernetes? Architecture Simplified!
Kubernetes Explained in 6 Minutes | k8s Architecture - ByteByteGo